This walkthrough demonstrates the minimum required to create a database using Entity Framework Core in an ASP.NET Core application and to develop basic CRUD screens. The walkthrough assumes that you have .NET Core SDK installed and that you have a suitable development environment/text editor. Visual Studio Code will be used in this example.
Creating an ASP.NET Core application
If you have a version of Visual Studio that supports .NET Core (2015 or greater), you can use the project templates to create a new .NET Core Web application. Alternatively, you can use a command line tool to create and build the project. In this example, you will use the command line tool from within Visual Studio Code.
The first step is to create a folder for the application in a suitable location. Name the folder EFCoreWebDemo. Once created, open the folder in Visual Studio Code. Having done that, press Ctrl + ' to open a Terminal window.
Next, use the terminal to type these commands
> dotnet new mvc
> dotnet add package Microsoft.EntityFrameworkCore.SqlServer
> dotnet add package --version 1.1.0-msbuild3-final Microsoft.EntityFrameworkCore.Tools
> dotnet restore
> dotnet run
The commands above
- scaffolds a starter ASP.NET Core application that uses the MVC framework
- adds the Entity Framework Core and EF Core tooling packages from NuGet to the project
- restores all packages
- builds and runs the application
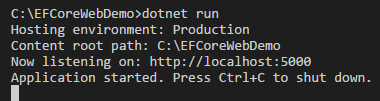
You should get confirmation that the application is running on port 5000:
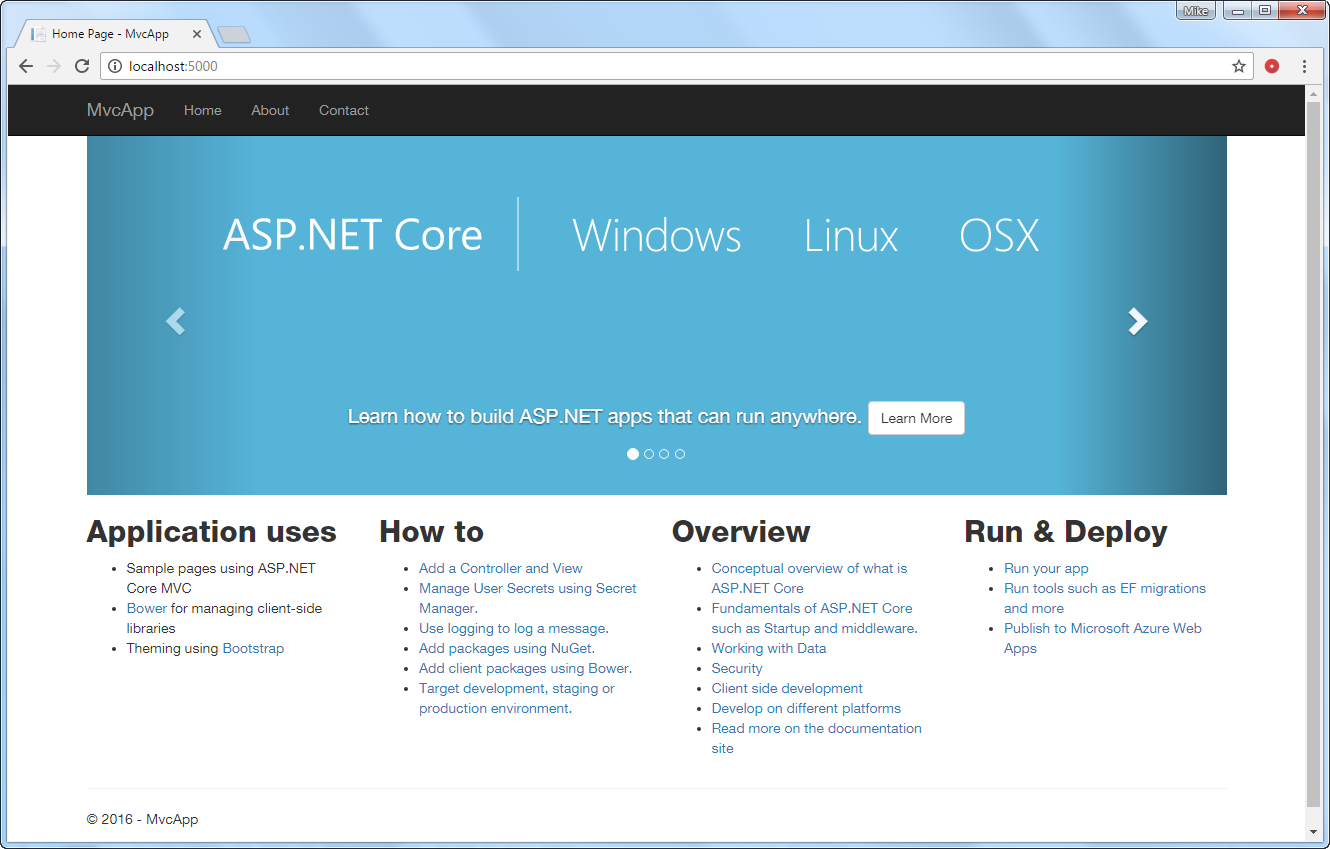
If you navigate to http://localhost:5000 in your preferred browser, you should see the standard Microsoft MVC application running:
To continue with the next steps, stop the application by pressing Ctrl + C.
Open the EFCoreDemo folder in Visual Studio Code.
Modify the .csproj file to include the following section:
<ItemGroup>
    <DotNetCliToolReference
        Include="Microsoft.EntityFrameworkCore.Tools.DotNet"
        Version="1.0.0-msbuild3-final" />
</ItemGroup>
This step is only necessary if the .csproj file wasn't automatically modified to add the entry when the Tools package was installed. See https://github.com/aspnet/EntityFramework/issues/7358.
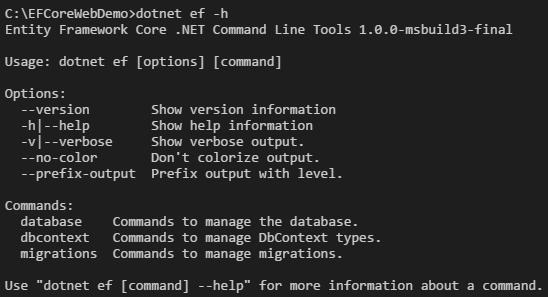
Once you have made this amendment, you can test to see if ef commands are available to you by navigating to the project folder in a terminal/command window and typing the following command:
dotnet ef -h
This should result in the initial help for the EF tools being displayed:
Creating the Model
Add a folder named Model to the application.
Add a new file named EFCoreWebDemoContext.cs to the Model folder and add the following code to it:
using Microsoft.EntityFrameworkCore;

namespace EFCoreWebDemo
{
    public class EFCoreWebDemoContext : DbContext
    {
        public DbSet<Book> Books { get; set; }
        public DbSet<Author> Authors { get; set; }

        protected override void OnConfiguring(DbContextOptionsBuilder optionsBuilder)
        {
            optionsBuilder.UseSqlServer(@"Server=.\;Database=EFCoreWebDemo;Trusted_Connection=True;MultipleActiveResultSets=true");
        }
    }
}
Note: The model, particularly the DbContext class, is declared inside a
namespace. If you don't place your context class in a namespace, you may come up against this long-running open bug when adding your migration.
Next, add a new file named Author.cs and add the following code to it:
using System.Collections.Generic;

namespace EFCoreWebDemo
{
    public class Author
    {
        public int AuthorId { get; set; }
        public string FirstName { get; set; }
        public string LastName { get; set; }
        public ICollection<Book> Books { get; set; } = new List<Book>();
    }
}
Finally, add a new file named Book.cs and add the following code to it:
namespace EFCoreWebDemo
{
    public class Book
    {
        public int BookId { get; set; }
        public string Title { get; set; }
        public int AuthorId { get; set; }
        public Author Author { get; set; }
    }
}
This code defines classes for two entities - Book and Author that participate in a fully defined one-to-many relationship. The code also includes a class named EFCoreDemoContext that inherits from DbContext. This class has two DbSet properties that represent the tables in the database (which are yet to be created). The EFCoreWebDemoContext class also includes a method named OnConfiguring where the connection string for a SQL Server database is defined. You should change this to suit your environment and database provider.
Before moving on to the migration, type dotnet build to ensure that the application builds correctly.
Adding a Migration
Migrations are used to keep the database schema in sync with the model. There is no database at the moment, so the first migration will create it and add tables for the entities represented by the DbSet properties on the EFCoreDemoContext that you added.
Visual Studio Code doesn't provide any support (at the time of writing) for creating and executing migrations. Therefore they will be managed using the command prompt. Having opened one (if it's not still open from having created and built the application), navigate to the project folder and enter the following command:
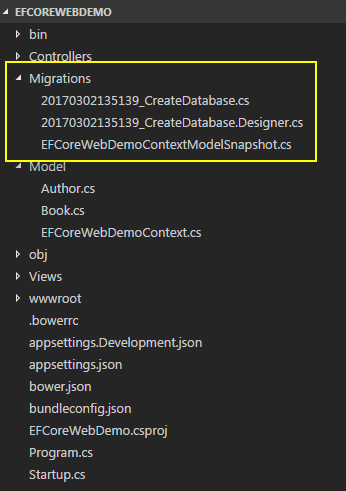
dotnet ef migrations add CreateDatabase
A new folder named Migrations is added to the project. It contains the code for the migration and a model snapshot.
Enter the following command to execute the migration:
dotnet ef database update
The database is created but all of the string fields are unlimited in size (nvarchar(MAX) in SQL Server).
Modifying the Database With Migrations
In the next section, you will modify the model to set limits to the size of selected string properties, and then use migrations to push those changes to the database schema.
Add the following to the using directives at the top of Author.cs and Book.cs:
using System.ComponentModel.DataAnnotations;
Modify the Book and Author entities so that they look like this:
public class Book
{
    public int BookId { get; set; }
    [StringLength(255)]
    public string Title { get; set; }
    public int AuthorId { get; set; }
    public Author Author { get; set; }
}
public class Author
{
public int AuthorId { get; set; }
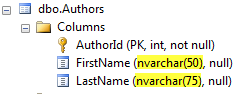
[StringLength(50)]
public string FirstName { get; set; }
[StringLength(75)]
public string LastName { get; set; }
public ICollection<Book> Books { get; set; } = new List<Book>();
}
In the Terminal, type the following command:
dotnet ef migrations add LimitStrings
followed by
dotnet ef database update
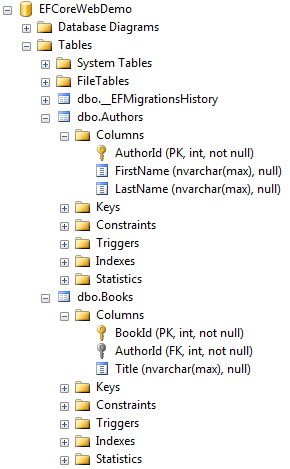
This will scaffold a migration that will alter the size of the Book's Title field and the Author's FirstName and LastName fields. You should also get a warning that the scaffolded migration could lead to data loss. In this case, there is no data to be lost so the warning can be ignored.
Once the migration has been applied, the database schema will be altered. Here's how the modified Author table should look:
Working With Data
In the next section, you will create a web page for adding new authors to the database and for displaying them. Add a new file named AuthorController.cs to the Controllers folder. Add the following code to the newly created file:
using System.Threading.Tasks;
using Microsoft.AspNetCore.Mvc;
using Microsoft.EntityFrameworkCore;

namespace EFCoreWebDemo.Controllers
{
    public class AuthorController : Controller
    {
        public async Task<IActionResult> Index()
        {
            using (var context = new EFCoreWebDemoContext())
            {
                var model = await context.Authors.AsNoTracking().ToListAsync();
                return View(model);
            }

        }

        [HttpGet]
        public IActionResult Create()
        {
            return View();
        }

        [HttpPost]
        public async Task<IActionResult> Create([Bind("FirstName, LastName")] Author author)
        {
            using (var context = new EFCoreWebDemoContext())
            {
                context.Add(author);
                await context.SaveChangesAsync();
                return RedirectToAction("Index");
            }
        }
    }
}
The code in the Index method retrieves all authors from the database and passes them to the View. The AsNoTracking method is used to prevent the context from unnecessarily tracking the data because it is intended for read-only use. The DbContext is instantiated in a using block to ensure that it is disposed of properly.
The Create method that takes an Author as a parameter is responsible for adding the new author to the database. It uses the approach whereby data is added directly to the DbContext, allowing the context to infer the type of data to be added to the database.
Finally, add a new folder to the Views folder and name it Author. Add a new file to the new folder called Index.cshtml. Add the following code to it:
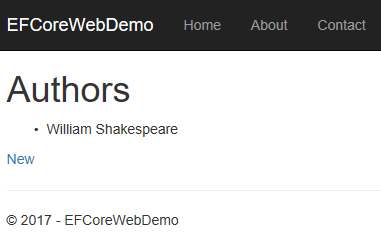
@model IEnumerable<Author>
@{
    ViewBag.Title = "Authors";
}
<h1>@ViewBag.Title</h1>
<ul>
@foreach (var author in Model)
{
    <li>@author.FirstName @author.LastName</li>
}
</ul>

<div>@Html.ActionLink("New", "create")
Then add a new file named Create.cshtml to the Author folder with the following code:
@model Author
@{
ViewBag.Title = "New Author";
}
<h1>@ViewBag.Title</h1>
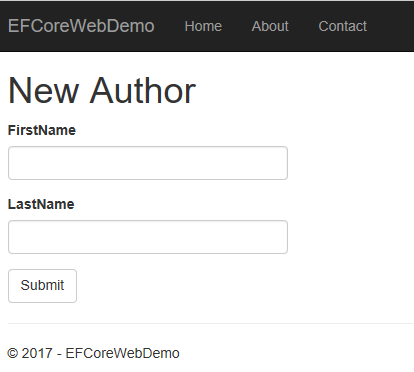
@using(Html.BeginForm()){
<div class="form-group">
@Html.LabelFor(model => model.FirstName)
@Html.TextBoxFor(model => model.FirstName, new { @class="form-control"})
</div>
<div class="form-group">
@Html.LabelFor(model => model.LastName)
@Html.TextBoxFor(model => model.LastName, new { @class="form-control"})
</div>
<button type="submit" class="btn btn-default">Submit</button>
}
Run the application by typing the following command:
dotnet run
Open a browser and navigate to http://localhost:5000/author/create. You should see a data entry form similar to this:
Enter an author's name and submit the form. You should get redirected to the index page where a list of any authors entered so far is displayed:
Adding Related Data
In the next section, you will add new books to the database which will be related to an existing author.
First, add a new file to the Controllers folder named BookController.cs. Add the following code to the new file:
using System.Threading.Tasks;
using System.Linq;
using Microsoft.AspNetCore.Mvc;
using Microsoft.EntityFrameworkCore;
using Microsoft.AspNetCore.Mvc.Rendering;

namespace EFCoreWebDemo.Controllers
{
    public class BookController : Controller
    {
        public async Task<IActionResult> Index()
        {
            using (var context = new EFCoreWebDemoContext())
            {
                var model = await context.Authors.Include(a => a.Books).AsNoTracking().ToListAsync();
                return View(model);
            }

        }

        [HttpGet]
        public async Task<IActionResult> Create()
        {
            using(var context = new EFCoreWebDemoContext())
            {
                var authors = await context.Authors.Select(a => new SelectListItem {
                    Value = a.AuthorId.ToString(),
                    Text = $"{a.FirstName} {a.LastName}"
                }).ToListAsync();
                ViewBag.Authors = authors;
            }
            return View();
        }

        [HttpPost]
        public async Task<IActionResult> Create([Bind("Title, AuthorId")] Book book)
        {
            using (var context = new EFCoreWebDemoContext())
            {
                context.Books.Add(book);
                await context.SaveChangesAsync();
                return RedirectToAction("Index");
            }
        }
    }
}
This time, the code in the Index method retrieves all authors and uses the Include method to eagerly load the related books from the database and pass them to the View. Again, the AsNoTracking method is used. The authors and their books are only being used for display.
In the first Create method, each of the authors is retrieved from the database and projected into a new form - a SelectListItem. Non-entity types are not tracked by the context which is why the AsNoTracking method is not used in this case, despite the fact that the data is for read-only use.
The second Create method features an example of the entity being added to its DbSet, rather than the DbContext as was the case for the author.
Next, add a new folder to the Views folder named Book. Add a new file to the Book folder named Index.cshtml and copy the following code into it:
@model IEnumerable<Author>
@{
    ViewBag.Title = "Authors and their books";
}
<h1>@ViewBag.Title</h1>
@if(Model.Any()){
    <ul>
    @foreach(var author in Model){
        <li>@author.FirstName @author.LastName
            <ul>
            @foreach(var book in author.Books){
                <li>@book.Title</li>
            }
            </ul>
        </li>
    }
    </ul>
}
<div>@Html.ActionLink("New", "create")
Finally, add another file to the Views/Book folder named Create.cshtml and add the following code to it:
@model Book
@{
    ViewBag.Title = "New Book";
}

<h1>@ViewBag.Title</h1>

@using(Html.BeginForm()){
  <div class="form-group">
    @Html.LabelFor(model => model.AuthorId)
    @Html.DropDownListFor(model => model.AuthorId, (IEnumerable<SelectListItem>)ViewBag.Authors, string.Empty, new { @class="form-control"})
  </div>
  <div class="form-group">
    @Html.LabelFor(model => model.Title)
    @Html.TextBoxFor(model => model.Title, new { @class="form-control"})
  </div>
  <button type="submit" class="btn btn-default">Submit</button>
}
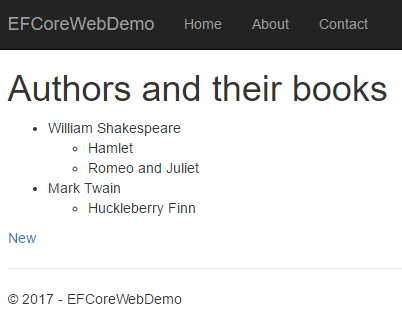
Execute the dotnet run command to build and run the application. You might need to press Ctrl + C to stop the application first. Once it is running again, navigate to http://localhost:5000/book/create where you should see a data entry screen like this:
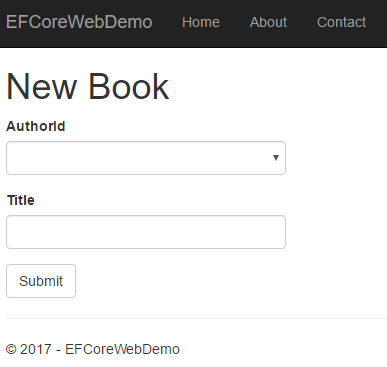
The AuthorId dropdown should be populated with the authors that you have so far entered into the application. Select one and enter a book title and hit the submit button. You should then be redirected to the Index view which will display a list of all authors and their books.